Tuesday, July 30, 2019

HOW TO PURIFY DIRTY WATER IN THE OUTDOORS


 Water is essential source for good health and drinking it regularly helps your body functions properly. Staying hydrated is important especially if you are in outdoors, but it’s not easy because the weight of water is heavy. Carrying enough water of around 6+ liters for three day-trip without exploiting an outdoors sources, like river or pond, can really weigh you down. In spite of being a source of good health, water can upset even the strongest of stomachs as natural water can be infested with waterborne bacteria.
So what to do and how to use water in an effective manner?
It isn’t difficult, Understanding how to use outdoor water sources in a safe manner, but does require some patience. Generally there are three ways to make drinking water safe: boilingfiltering, and chemicals.
Boiling

By heating water to the boiling (5-10 minutes) you can kill any bacteria within the water and create safe drinking water Boiling water is probably the cheapest but it is really time consuming. A little more work is required that is simply wait and allow the water to cool down and you’re ready to start guzzling it down.
Filtering/purifying

It is necessary for us to know the difference between filtering and purifying. Essentially they both do the same job but a purifier takes the ‘cleaning of water’ one step further. Purifier introduces a chemical component to kill off things like viruses that filters won't catch. It is safe and fast to pump water out of a dirty, unfiltered source, into a clean container. Filters allows you to drink water immediately once its clean rather waiting for to cool down like in boiling. Filters have become much smaller, less expensive and more effective in last ten years.
Chemicals

Iodine tablet/drop are extremely effective in killing all the bacteria that stands in unfiltered water and are used most commonly to convert water into safe drinking water. They are a popular are a popular choice for many outdoor enthusiasts, as they are easy to use, lightweight and ultra-small. Newer tablets even offer a second tablet to help remove the iodine taste from a clean water, which takes up to 30 minutes to be totally effective. To make this process easier, there are some additional methods like moving water is usually a better source than stationary, as it helps to remove the dirty top layer that can form on ponds and pools. It is considered as safe practice to drink water directly from a spring head.

Thursday, July 25, 2019

How To Take Care Of Your Zippers

When it comes to camping, the quality of tent zippers cannot be compromised. Imagine tucking in for the night after a very rainy day of camping, only to find that the tent zipper refuses to zip close and its teeth has come loose. Without a repair kit and replacement zipper on hand, the campers will soon be in for a very wet, cold, and windy night.
Its important to look for high quality and top grade zippers while choosing your tent. There are some which are simply not stable and can break because of pressure as they start to become rusty and tarnish due to the exposure of light. There are mainly two types of zippers,
  1. Coil Zippers
  2. Tooth zip, which is also known as the Vislon or “chunky” zip
How to Take Care of Tent Zippers
  • Always keep the tent and its zippers free from grit and dirt. After using the tent, shake it out to remove the dust and dirt, and wipe the zippers with a piece of cloth.
  • Don’t force zippers if they refuse to budge. If fabric somehow gets caught in the teeth, gently work it out instead of pulling on it. The slider or coil can be easily damaged if the zipper is pulled too hard.
  • Use zipper lubes so the tent can be zipped up smoothly and without snags. However, do take note that applying lube or any other grease-based product on the zipper makes it more prone to dirt and dust. Wipe and clean the zippers fairly regularly if lubrication is used.
Here are some tools to fix some of the problems:
A Set of Pliers
Normal pliers or tool like plass, will help fix the uneven teeth of the zipper. If you don’t really have the set of pliers needed to fix the zippers, then you can also use bi-scrip/locking tool to fix the teeth back which people normally prefer to have better grip.
Glue
Glue can basically help us fixing the torn out zipper from your tent, it increases the stability and shields the tent. The best glues which are available in the market right now are as follows:
  1. Tear Mender TG06H Fabric and Leather Adhesive
  2. Beacon FT4D Fabri-Tac Adhesive
  3. Permatex Fabric Repair Kit 25247
  4. Silnet Glue.
Lubricant/Oil/Crayon/Grease
Sometimes, the zippers get stuck in the middle and doesn't move back or forth.  A Lubricant/Oil/Crayon or Grease (anyone of these) can help smooth it out and keep the canvas tent zippers intact.
Spare Zippers or Zipper Parts
It’s important to keep spare zippers, just in case a zipper gets broken and you need to get rid of the insects and bugs.
Bit by Bit Process
Identify the problem: There might be various reasons due to which your zippers might not work properly. For example, stuck zippers, broken slider, and teeth that won't clinch are only some of these common issues. To resolve these problems you first need to understand what is causing your zipper not to work properly.
Apply lubricant: If your zipper is not working properly and it is getting caught, take a graphite pencil and rub it on the teeth of zipper. If this trick doesn’t work then you need to apply lubricant, which is not oil based. Also check the slider as sometimes it comes out which may cause it to stop clinching the tent's zipper teeth together.
Check stuck fabric in the zipper: Occasionally, you may discover that your zipper or slider is not working properly because of a piece of thread or cloth that is stuck in the zipper. When this thing happens, the first important thing to remember is to be gentle. This tip is important because you do not want to ruin your tent by creating any tears or rips. Pull your zipper to the direction where it is going from where it is stuck, and pull the fabric in the opposite direction.
Properly position the locking pliers: Make sure you use locking pliers when they are in locked position. Use the screw adjustment, when closing on the zipper slider. Be careful when clamping the zipper slider. Ensure that you do not clamp the zipper fabric or zipper pulls. Remove the pliers and slightly tighten the screw adjustment. A 1/8th or 1/16th of a turn would be enough. Remember to apply the slightest pressure possible to both sides of your zipper slipper when re-applying it.
Clamp down the locking mechanism, after you place the locking pliers again to its right position on the zipper slider. Make sure that the locking pliers lock moderately as you clamp down. On both sides, press the zipper slider using the same setting before you change anything. You may need to do a few tries using successively tighter settings on your locking pliers, but rest assured that your tent zipper will zip properly again.
Determine if the slider needs replacementZipper will not be able to work if the slider is broken. So if in case this happens ensure that you have another slider to fix your tent zipper.
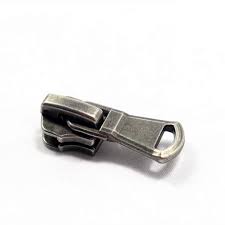
To replace the slider, firstly locate the broken zipper and then remove the zipper stops with the help of pair of pliers. Pull down the zipper slider to detach it from the zipper till the point where it starts. Next you will have to put the top at the top and bottom and use the pliers to crimp the bottom and top stop. To make sure that it works fine, slide the zipper up and down. Lastly, apply some glue on the zipper's bottom.
When you are buying the outdoor shelter, quality of the zippers is very important to check as it is the crucial factor before making the purchase.
Ways to make your zipper lasts longer
Here are some quick tips that will not surely prevent your zipper from early damage.
Never force your zipperwhich means don’t over stuff your tent as this will put weight on zipper especially when closing the tent. Never force your zipper that is stuck, instead do it gently, hold the zipper’s track using your one hand and back the slider up. Free the stuck textile by sliding  the zipper from one side to the other.
Regularly clean your zippersWithout proper maintenance your tent zipper will less likely live longer especially when it continuously accumulates dirt and grit between its zippers. Regularly clean your zipper as it takes a very less time to clean it and remove all impurities that accumulate into the teeth which may impede the free movement of your zipper.
Sea salt can be one of the destructive elements to your tent zippers, so make sure that you do the cleaning after your tent gets near to the sea. Use cool and fresh water when rinsing your tent zippers.
Lubricate the zipper: This tip is one of most effective ways of prolonging the lifespan of your tent zipper. Zippers also deserve to have healthy teeth and body, so go an extra mile in taking care of it by applying a dry grease on zipper tracks and post ends. While applying lubricant is generally helpful, it is also important to take the type of lubricant into account if you decide to use one. Manufacturers have come up with several products which they design specifically for outdoor gears, and these items are what typically works best for your tent zippers. Some campers, hikers, and backpackers do not recommend the use of wax as this lubricant may cause dirt to get stuck in the zipper while scented wax has the tendency to attract bugs and other insects.
Greasing your tent zippers up is a great way to protect your gears. Greasing up the tent zippers is one effective way to keep them running. Before applying any lubricant, make sure you have cleaned the zipper because you want to avoid catching any dirt in your tent zipper. You may have also come across various zipper lubricant products. You may use pastels or powdered graphite. Others use beeswax which they can soften using a hairdryer or a heat gun to make it quick-to-apply whereas some people prefer using Teflon-Silicone Lubricant which allows easy handling of the tent zipper.

Wednesday, July 24, 2019

How To Keep Your Cash And Other Valuable Safe At Festivals.


How To Keep Your Cash And Other Valuable Safe At Festivals.


In UK, festival season strikes very commonly, which now upon us and it’s time to have that last minute packing panic. It’s very ordinary to worry about losing your valuables in the mud, to thieves and through drunken antics.

Luckily, theft is very rare at festivals, only handful will fall victim to theft out of around 10,000 people. Opportunities are everywhere, as a festival-goer you should make it difficult for thieves to get these opportunities to get to you. Here are our tips & tricks on how to keep your valuables safe at music festivals.

How To Deter Tent Thieves

Most of the people who attend festivals, their primary motive of it is to have fun and enjoy with family and friends, due to which tent theft is really rare at festivals. However opportunities are everywhere. Leaving cash or valuable in your tents is not a good idea, it’s much safer to keep them on your person. Padlocking your tent might seem like an effective security measure, but it is actually the opposite. It notify thieves that there must be something worth stealing thus padlocking your tent is not advisable.

Spread Everything Out

Don’t make it easy for the thieves to come in your tent and just swipe a bag and run by keeping stuff in organized way. Rather leave your tent in a complete mess and spread your valuables in different places. For example keep some cash in your wash, some in your socks, some in your pillowcase, some in a bag of dirty clothes, etc, which will lessen the chances of losing all the valuables.

Make Friends With Your Neighbors

Once you are done with placing your tent at your desired location, make sure to get yourself introduce with your neighbors and become friends with them as soon as possible, which will make your trip more excited and will be helpful for security. If there is any suspicious person standing near your tent or your neighbor’s tent so you can ask them some friendly questions and tell him that you are doubtful. Your tent can do same for you in your absence.

Don’t be smug

People usually go back to their tents late night in a drunken state, taking out their clothes and throwing it anywhere in a tent. When they wake up in morning they are not able to find their clothes and as well as their ID cards, electronic gadgets and other valuables. In order to avoid this, ensure that you keep all your valuable safely before sleeping. Same goes for handbags or backpacks, empty them before you go to sleep and also when you go in huge crowd make sure to keep your belongings in front pocket of your bags or in some hidden pockets of your bags to keep them safe from thieves.


“Sorry! Wrong Tent!”

This actually happens a lot, maybe it’s a genuine mistake, but who knows. Imagine yourself waking up in morning and seeing a stranger sleeping in your tent or some stranger disturbs your sleep by trying to climb inside. If a tent owner wakes up, stranger will just say “SORRY” and will move to other potential victim. It is because usually people buys tents from local stores where there is sale on tents, which increase the provision of having same tents and then facing such kind of issues.


To avoid such problem you should put a unique flag outside your tent or keep a torch close to you while sleeping, so if someone tries to step in you can shine this on his/her face and signal them to move out.

Other ways to protect valuables

·         Get insurance for your valuable if it is so much important for you.
·         Report all incidents to the police about the stolen item so they might help you finding your asset.
·         Check the festival’s lost property policy as festival will likely have lost property policy, many items are recovered and returned to their owner.

Get Creative

You can attach something noisy with your zips inside the tent, such as empty beer cans, which can be attach through strings using ring pulls, working like a makeshift intruder alarm, so if someone tries to enter it make loud enough noise to wake you or deter an intruder.
You can also keep bottles outside your tent door under the mats provided by white duck outdoors along with tents, so if in case someone try to enter in the tent these bottle will make sound that will alert you before he/she steals your valuable.

Tuesday, July 23, 2019

How to clean a Tent


How To Clean A Tent?

Canvas camping tents are very elastic and make exotic shelters for camping trips. Over the time, you might see filth on your tent, your tent will show grime from your camping adventures but a little care from your side will keep your tent fresh and clean.  The good news is that canvas tents are easy to clean with the help of a few common household tools. Follow the simple steps below.

Step 1 - Remove Dust from Your Tent
You can easily clean dust from your canvas camping tents, if your canvas camping tent has accumulated lots of dust, dirt, and debris. Starting with unfolding your tent and aggressively shaking it to remove as much dust as possible and then lay the unfurled tent on a clean surface. Attach the stick brush with your vacuum cleaner and proceed to thoroughly vacuum the tent, paying special attention to any exceptionally dust-laden areas, corners, and storage pockets, as there are very high chances for Bugs to be there. In case you don’t have vacuum cleaner or forgot to take it you can use a Dust buster, or a broom and dustpan in its place.

Step 2 - Remove Mold and Mildew from Your Tent


Once you are done with cleaning dust from the tent, separate the canvas tent canopy from the floor of the tent. You will wash the floor separately. You can leave the guy-lines on if they are dirty, just remember they must also be retreated in the end to prevent UV damage. If there are mold or mildew deposits on your canvas tent, you can effectively clean it with an easy-to-make homemade cleaning solution. (Read our blog on how to clean mold or mildew from a tent). To make this solution, combine ¼ cup of white wine vinegar and 1 cup of water. Combine the elements inside an empty spray bottle and jiggle it thoroughly. Spray your cleaning solution onto any mold or mildew-infested areas and allow it to sit for few minutes. Then you can wipe away any mold and mildew deposits with a sponge, paper towel, scrub brush, or washcloth. Continue to repeat this process until your canvas tent has been completely purged of mold and mildew.
Once you are done with removing all the traces of growth from the floor of tent, take a second empty spray bottle and fill it with warm water, which is healthy for cleaning the tent, and use it to rinse off your cleaning solution. Immediately use dry cloth or paper towel to dry the freshly cleaned area.
Step 3 - Remove Stains from Your Tent

You need to give your canvas camping tent a full wash, if it is exceptionally filthy and covered in stains. To perform this, fill a very large container with about 1 foot (30cm) of warm water. Add various cups of Ox clean and use your best judgment on how much to use vs. how dirty the tent is and reference the suggestions on the box. Stir thoroughly until the solution is dissolved completely. Warm water dissolves the solution better than cold water. Place the tent canvas (not the floor) in the container and fill it with water until the tent is submerged. Stir and agitate thoroughly so the solution is well mixed and the canvas is soaking evenly. Allow the tent to marinate for 4-10 hours, stirring occasionally. It’s OK to leave it soaking overnight if you need to. Place you tent on to clean surface to allow it to get dry and then clean it like a kitchen floor. Sweep it, mop it and rinse it. Repeat the process of soaking several times to make sure it’s completely clean then spread the canvas out on top of your clean tent floor and pitch it. You can also pitch the floor on top of your car, then place the canvas on top of that to assist with run off. Don’t put the canvas directly on your car because Ox clean can strip clear coat. Always allow your tent to dry completely after a camping trip and any cleaning. If you let the water stay for too long, the moisture could cause more mold and mildew to form. The best way to dry every area of your canvas tent is to set it up and allow it to air dry.
With a little TLC and a few basic ingredients, your clean tent will allow you years of camping enjoyment.

Wednesday, July 17, 2019

How Camping Helps In Preventing Stress and Depression


How Camping Helps In Preventing Stress & Depression

Have you ever find yourself feeling tranquil, more relaxed, or more attentive after spending time in nature? That’s because nature is very pleasing and compelling and time outside has studied and proven benefits for your mental health.

Relieving anxiety, stress and depression.
A humble and unpretentious stay in the outdoors can do wonders for relieving anxiety, stress, and depression. Manifold studies have demonstrated that nature has a very constructive and positive effect on your mental health. What you see, hear, and experience in nature can revamp your mood in a moment.

There is a well-built relationship between time-spent in nature and reduced negative emotions. This includes symptoms of anxiety, depression, and psychosomatic illnesses like irritability, insomnia, tension headaches, and indigestion.
Feeling stressed? Research have shown various links between exposure to nature and stress reduction. The moment you start exposing nature and looking around for fascinating views, Stress is relieved within minutes of exposure to nature as measured by muscle tension, blood pressure, and brain activity. The cortisol, which is a stress hormone, reduces significantly when you spent time in green spaces. Nature also increase endorphin levels and dopamine production, which promotes happiness.
Other mental benefits.
Nature has a numerous of other brain benefits as well. Contact with nature has restorative properties, increasing energy and improving feelings of vitality and focus. Symptoms of ADHD also starts reducing when you are nearby the nature.

Being at a place surrounded with glorious views of mountains, waterfalls, greenery, and natural beauty enhance creative thinking and restore capacity for concentration and attention. Also for people who have problem of sleeplessness, a two-hour walk in the woods is enough to improve sleep quality and help relieve sleep problems. The process of circadian rhythm gets reset when you wake up with natural sunlight instead of artificial lights, which will help you feel refreshed after a better night’s sleep. 


Grief process of a human mind and body gets refine when they experience nature. This is because exposure to nature causes better coping, including improved self-awareness, self-concept, and positively affected mood. These positive effects of nature helps people to be make good relation with other and caring towards others.

What you can do.

Getting outdoors doesn’t have to be a lot of work. There are lots of simple ways you can get quality time in nature.

Walks in woods or in green spaces. Daily nature walks improves physical and mental strength of people. It helps them combat stress while improving mental well-being.
Move your workout into the outdoors. Regular use of natural areas for physical activity can reduce the risk of mental health problem. Bodily activities like walking, cycling, jogging, or doing yoga in a natural environment makes you happier than in the city.
Book a camping trip. Immersing yourself in nature for a longer period of time is the best way to absorb the health benefits of the outdoors. Especially when you are on a trip with your partner, family, or with friends you share your problems with them, which make you feel lighter and you get ideas or solutions to resolve your problems which lessen the stress on your mind and helps you feel the beauty of life and nature.

Ready for your nature dose?

Find a park near you to walk and look for the beautiful or dreamed places to camp where you along with your friends and family can relieve your stress or help someone to relieve his/her stress or depression.

How to keep Bugs away from Your Tent


How to Keep Bugs Away from Your Tent

What can change your trip from a living heaven to living hell? “BUGS”…


These bugs and other outdoor pests can make your camping a living hell. If you are a fan of great outdoors, you probably know from your experience that how these tiny insects can ruin even the most idyllic camping location with the noises they make or the bites they deliver to you. Luckily, you are not helpless in the face of these little demons. Don’t be discourage from setting up camp exactly where you want by a handful of insects. Just follow the instructions in this article to keep bugs away from your tent, and you will be able to enjoy pest-free outdoor experience of “Cold Air in Dark Night with Warm Fires and Bright Stars”. Read on to find out more.


First, make sure all the equipment you are carrying with you for camping is in good working order before you head out. Carefully check your tent, set up your tent in the backyard, for any places from where the bugs could get in, small holes, or maybe the zip is broken leaving gaps. If you find any such areas, repair them -patch the holes, fix a snagged zipper by lubricating with oil to see if that will release it.
Secondly, once you are out in wild choose the location for your campsite wisely. Places which are prone to insect infestations- such as those with standing water (a literal breeding ground for mosquitoes), lots of vegetation (a source of shelter for the same), or the presence of utility light poles (bugs are attracted to light)- do “Avoid” them. Next look for the natural features of your environment that are within your control, which means you do such activities in which you can prevent bugs gathering around your tent. For example, keep the dustbins away from your tent or don’t eat inside your tent as the smell of food can attract bugs. Don’t leave your cooking stuff unwashed and make sure you store your food in either plastic or airtight container. Similarly, as mentioned above, bugs are attracted towards light, try not to use torches, lanterns, and sources of artificial light away from the door of your tent.


These are the “DO IT YOURSELF” methods for deterring bugs during your outdoor adventures. Here are some necessary things which you should carry with yourself when u r going for camping and expecting an insect free zone. First, take along a good insect repellent - most of the commercial ones are very effective, yet also contain DEET, a chemical thought by some to be toxic to humans. If you don't want to expose yourself to this substance, then try one of the all-natural home-made ones - there are lots of recipes out there on the internet, so do your own research. In many of these 'natural' bug sprays, substances like eucalyptus oil are the active ingredient - so not only are they effective in shielding you from mosquitoes, they also make you smell good. Citronella candles are another good option here. Some outdoors men will even go to the lengths of hanging garlic and onions upon their tents as it is thought to keep the insects away! A final pointer: wear insect repellent clothing, i.e. if the climate permits, choose thickly woven long sleeve shirts and pants, with thick woolen socks and heavy boots. On the other hand, if it's really hot, this won't be an option: fortunately, though, there are special clothes you can purchase that have insect repellent within their fabric, and that are said to work well in deterring bugs.

Wednesday, February 13, 2019

YOUR GUIDE TO ENJOYING BURNING MAN


You’ve probably heard about all the great experiences people have had when they went to burning man festival. And if you’re reading this, chances are this is your first time and looking to find out how you can prepare yourself best for it.


What is 'Burning Man'?


First and foremost, let’s have little history lesson about how this festival came to be.

The first burning man was never intended to be a festival, Larry Harvey, an artist in San Francisco decided to make a large wooden sculpture in the shape a man as an art piece. He then decided to use it as a simple bonfire and took it to baker beach. This spectacle gathered such a crowd that every year people came to baker beach just to see the burning man engulfed in flames. As the years went by, the sculpture kept getting bigger and bigger until it was no longer allowed to be set on fire without permit. So Larry, along with this friend Jerry James decided to take the burning man to a remote desert in Nevada which then became known as ‘Black Rock City’. Now, the burning man has become a week long annual festival to inspire, express and celebrate creativity. It’s a hotspot for many artists and musicians to perform, showcase or to seek inspiration.

As early as this may be, this year’s burning man will be held on August 24th till Sep 2nd. So if you’re interested in going be sure to snag some tickets as they sell out within hours! So pack your tent and your backpack and check out their official webpage for ticket information.


What to expect at the festival


As soon as you arrive at black rock city you’ll quickly realize that majority of the other campers with all their fancy wall tents or bell tents, aren’t there to entertain you, but to express themselves instead. So set up your tent, don’t be a spectator, participate and have a blast!

During the day, since it’s quite hot out in Nevada in this season, this is usually the time people tend to do less physical activities and check out all the art showcases others have to offer. Some take this time to just catch up on sleep, eat and replenish.

But hey, if you’re an artist or an organization looking to showcase some brilliance of yours, good news! You can apply for an official art grant on their official website.

Now if you’re still unsure on what you can do and want to support or just participate in the burning man project you can always volunteer. There are plenty of performers looking for helping hands or like minded individuals to collaborate with.

Come nightfall, it’s time to party! There are dozens of DJs and artists that start performing as soon as its sunset. There isn’t an official list of performers as of yet, there’s at least 50+ artists and bands that play every year. Last year even Skrillex, Flume, Infected Mushroom and many more came to perform! You will definitely find something you like.

There so much to see and experience at burning man, be sure to share your experiences on facebook and instagram with #man, #burningman, #camping and #blackrockcity hashtags.


Must haves for Burning Man


That’s great and all, but you’re probably left wondering, “Where will I sleep?” As you can guess by now, there are no hotels for miles around, your best bet is to bring a tent. Now this isn’t an ordinary camping trip in a park or your backyard. This is desert camping and you need some heavy duty tents to combat the harsh environment of it. As such it’s suggested to use a bell tent or wall tent.

Water, more water, and even more water! Dehydration comes at you in full force at burning man you best be prepared. So how much water do you need? Well, according to burning man project you need to have at least 2.5 gallons of water per person per day! This does include water for other necessities such as cleaning, washing and cooking.

Bear in mind the festival is a temporary city with no existing infrastructure, you will not find a fast food restaurant nearby. You may find some people with permits to ‘gift’ you food. But otherwise bring your own food to last you and your group for the entire week. Salty food is recommended as you tend to sweat a lot during the day, plus it tastes better when you’ve lost some yourself.

Apart from what you’d normally bring in your list of essentials, you must absolutely bring a pair of goggles. You cannot imagine how hard it is to navigate yourself around when you can barely open your eyes. So pack a pair of goggles and make it look funky, everyone else does it.

You know black rock city as estimated to be about 7 square mile patch, the equivalent of downtown san Francisco! You can’t possible imagine walking around everywhere in this heat now can you? The solution? Bring a bike! Don’t worry even you don’t have one you can always buy one at one of the last stops before you enter black rock city.

Oh yea, almost forgot to mention, neon…. That’s right. When it gets dark it REALLY gets dark! Make sure you put any piece of neon lighting or soft led lights on your bike or costume. Get Creative with it, after all its time to party, it totally fits the theme! Besides, people really hate it when they’re moving around and out of nowhere, someone just suddenly appears in front of them. Some people really get hurt badly sometimes, especially on bikes.

Now you’ve packed more than what you initially expected, and you need a place to store all your belongings. This is exactly the reason why you should have a Bell tent or Wall tent in your choice of tent as they tend to have enough space for a small party with lots of stuff to store and keep safe.


Canvas tents to look at for Burning Man


Since Black rock is a desert, you’re basically out in the wild. It’s time to bust out that fancy tent we talked about!

Depending on the size of you group you’re going to have to bring a large tent or more. And at White Duck Outdoors, there is variety of tents for all kinds of camping. Here are some of their popular and most reliable tents ideal for week long camping in the desert.

Cotton Bell Tent


Suitable for any small party going to burning man, the bell tent is a very common sight at black rock city. With breathable cotton canvas the Regatta Bell Tent is the best tent for burning man!

Capacity: 3-8 people.
Water and Fire Repellent Canvas.


Cotton Wall Tent


Ideal for anyone with something to showcase or store. This cotton canvas tent is the perfect choice for anyone with an art piece to showcase or simply to store all your equipment or art belongings while keeping them protected from the harsh environment of a desert. 

Capacity: 8-14 people.
Water and Fire Repellent Canvas.


Family Cabin Tent


An alternative choice for a small party or solo goer to burning man festival. The Family Explorer Cabin Tent comes with an awning perfect to block the sun when you decide to take a seat outside.

Capacity: 6-8 People
Water Repellent Canvas.


You were never really there!


When the week is finally over, and the Man has burned, it’s time to pack up.  But there was never really a trace of you before you arrived, and there shouldn’t be any when you have left. This includes that empty bag of chips you don’t even remember where you threw it away. Anything that wasn’t there when you arrived should not still be there when you depart. After all, you were never really there.


Tuesday, October 23, 2018

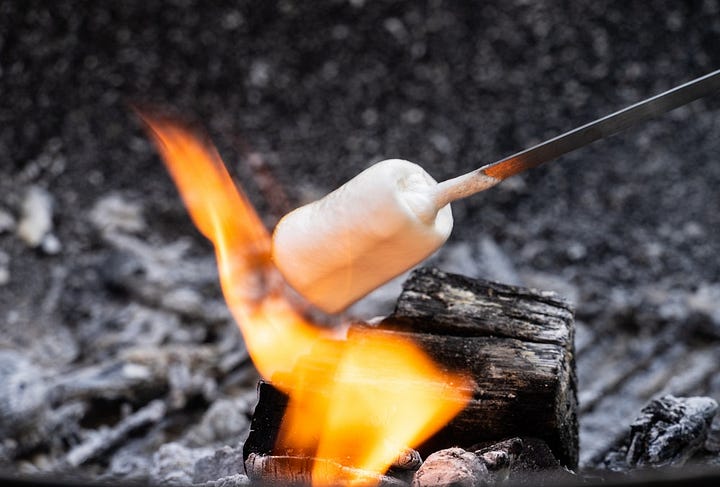
roasting marshmallow on campfire

Campfire & Marshmallows — a Match made in Heaven

When people think about camping in the winters so eventually people picture those warming bonfires and those gatherings and stories told around camp fire and most important of all those marshmallows roasting by the heat of the fire.
These are off course memories that stay alive in your head for a lifetime. Marshmallows are the most fun part of a bonfire wherever it is set at a beach or in the woods. So to make the process of easier there are some tips and tricks that will help make it easier and tastier.
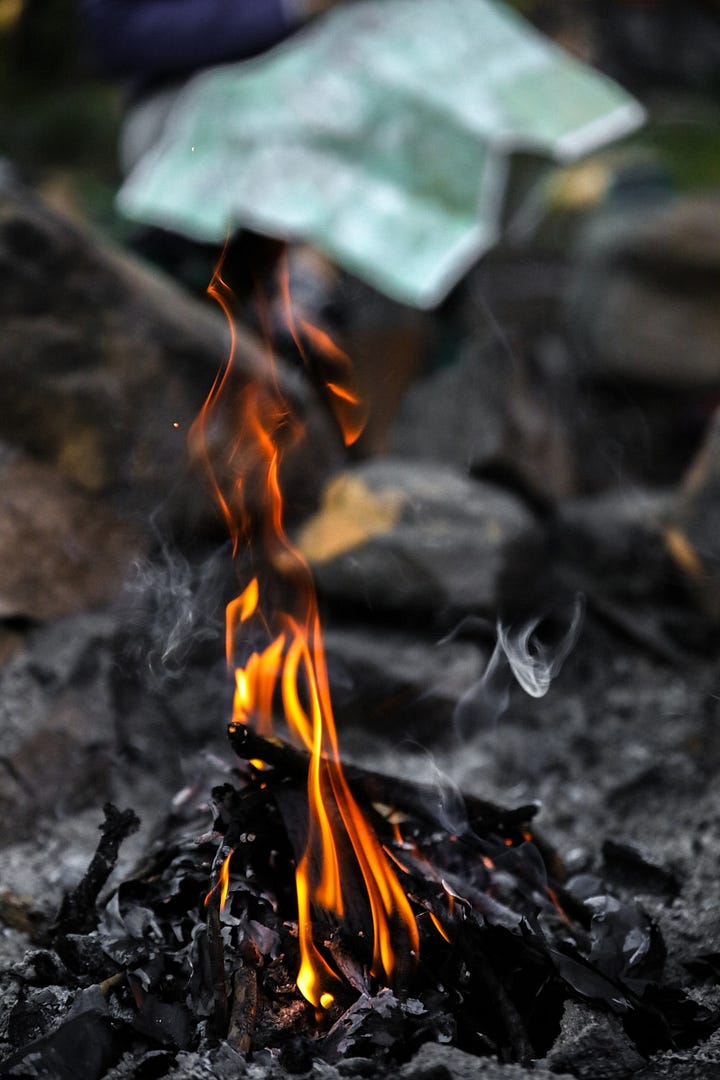
First of all, the things on the list that we need to to know is how to set up fire ? A pile of grass, dryer lint, paper, char cloth. Small twigs to use as kindling. Build it gradually outward and upward from small to large, leaving plenty of free space for air. Gradually add branches as soon as it has caught fire.
Secondly, choosing the right the stick for roasting and also the way of that you would be inserting the to roast the marshmallow as there are some sticks that don’t melt from heat or even break .You are also recommended to insert the whole stick inside to prevent slipping of the marshmallow. But eventually stacking one by one and roasting them one by one is always recommended.
Once the tree branches start becomes ashes and getting less you will disappear then the red coals will start glowing. By then the place just above the fire is the right place to roast your marshmallow. Start handling the stick in which you inserted the marshmallow above that fire and start rotating it rotate the stick as you go so the heat toasts the marshmallow equally on every side.
You’ll see the outer surface turn brown as it cooks. You can either keep up a steady rotation until the marshmallow is light brown all over, or cook one side until it’s done, then start rotating again but from another side, The heat coming off from this coal oven will caramelize that sugar , and there are no gout of fire to ruin the majestic white.
Precautions: If you aim for the perfect marshmallow toast try placing it over a blown out fire because placing it directly over the fire will might end up with a black coal as output. Also if the heat causes the marshmallow catch up fire then don’t violently just pull over the marshmallow to your side because if it interacts with interacts with your skin then it might cause some really serious burns that will really hurt. After pulling it out wait at least 30–70 seconds because they are extremely hot as soon as they are taken out.
They are so many different options you can try with Marshmallows in addition to roasting them while camping or setting up tent:
Roasted Marshmallow with Hot Chocolate is the perfect blend for a chilly night
Nutella sandwich cookie with marshmallow sandwiched in between is also the crunchy gooey treat
Ooey, gooey and slightly singed, is there anything better than a sticky-sweet toasted marshmallow? Skewered and cooked over an open camp fire or sandwiched between chocolate and graham crackers to make s’mores, they’re basically the most decadent treat on Earth esp when you get to enjoy with family, partner or friend.
Which marshmallow treat do you usually enjoy the most? Comment below if you have used any of the above or if you have more interesting ideas. Cheers!!